
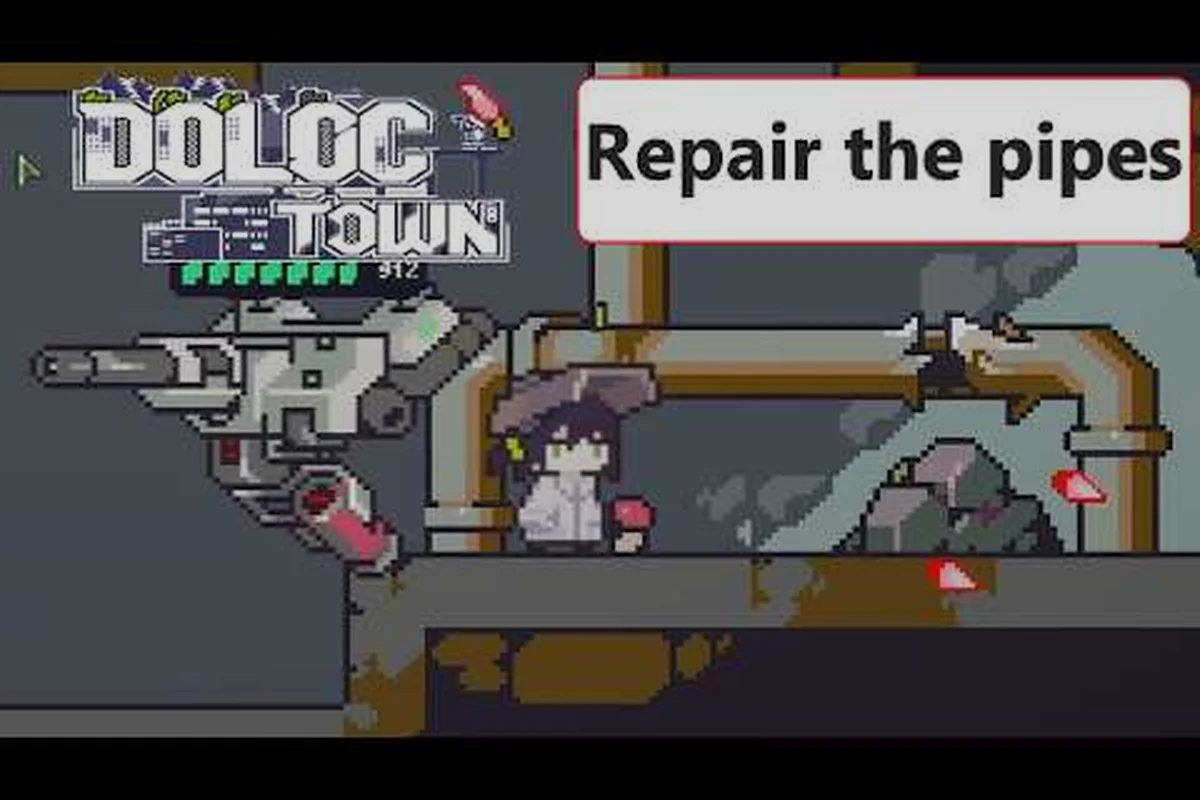
垂直農場はDoloc Townの中心であり、Doloc Townのプラットフォームの建て方を正しく学ぶことが、苦戦する入植者と繁栄する終末後の農学者を分けるポイントです。2026年8月6日のDoloc Town automation 1.0のリリースは、プラットフォームが単なる装飾的な足場ではなく、ソーラーパネル、風力タービン、ドローンステーション、アップグレードされたセラー(地下貯蔵庫)階層を支える骨格となったため、建物構築のメタ全体を書き換えました。このガイドでは、最初のスクラップ強化スラブから完全稼働する垂直メガファームまで、プラットフォーム建設の全工程を解説します。
settlement始めたばかりの方は、この記事を包括的なDoloc Town 建物ガイドおよび基礎的なDoloc Town 始め方のウォークスルーと合わせてお読みください。これらを組み合わせれば、荒れたタイル1枚から複数階層・ドローン駆動の収穫体制まで全行程をカバーできます。
プラットフォームの階層を理解し、垂直農場が重要な理由
Doloc Townのプラットフォームは、入植地の有効床面を空中に拡張するモジュラー式で積み重ね可能なタイルです。公式Doloc Town on Steamのページによれば、プラットフォームを使った垂直農場の建設はアーリーアクセスからのコア機能ですが、1.0アップデートで全階層に新しい自動化フックが追加されました。放射能に汚染された荒廃地を水平方向に掘り進む代わりに、上へ積み重ねることで、地表の危険から作物を守りつつ、地表タイルを crafting stations、animal pens、探索準備のために確保できます。
プラットフォーム階層の比較
下の表は、現在の1.0ビルドにおける各プラットフォーム階層の挙動をまとめたものです。数値はSteamストアの説明と公式Discordのコミュニティ報告から引用しています。
| プラットフォーム階層 | 構造コスト | 消費電力 | 解放される自動化フック |
|---|---|---|---|
| Tier 1 — スクラッププラットフォーム | スクラップ12 + 木材4 | なし | 手動植え付けのみ |
| Tier 2 — 強化プラットフォーム | スクラップ20 + 木材8 + 金属部品4 | タイルあたり1電力 | 土壌区画 + 基本給水 |
| Tier 3 — アロイプラットフォーム | スクラップ30 + 木材12 + 金属部品8 + アロイプレート2 | タイルあたり2電力 | ドローンステーション対応 |
| Tier 4 — 養液栽培フレーム | スクラップ40 + 木材16 + 金属部品12 + アロイプレート4 | タイルあたり3電力 | 自動種まき・自動収穫・遺伝子マシン搭載 |
Tier 1は練習用の足回りです。Tier 3はドローンステーションがアロイグレード以上のフレームにしかスナップしないため、Doloc Town automation 1.0のループが費用対効果を生むようになります。これらのタイルの積み重ねを完全に把握したい場合は、vertical farm buildingの深掘り記事で階層ごとの耐荷重と作物収量が解説されています。
1.0アップデートが建築順序を変えた理由
1.0以前では、すべてのプラットフォームが受動的な栽培台として機能するため、プレイヤーは電力計画を無視できました。Gamespressの発表リリースによれば、1.0では完全な自動化が導入されました — 種まき、育成、収穫用のソーラーパネル、風力タービン、ドローンステーションです。つまり、Tier 3プラットフォームを設置した瞬間、ゲームは次の電力をどこから得るかを問い始めます。電力計画をおろそかにすることが初心者が行き詰まる最大の理由で、無電源のフレームにはドローンがドッキングを拒否するためです。
建設開始前に素材を集める
プラットフォームを1枚でも設置する前に、まずストックを確保する必要があります。荒野を行き来しながら「その場」で建てようとすると、昼サイクルが無駄になり、Long Night Festival中の戦闘エンカウントにも晒されます。
コア素材チェックリスト
| 素材 | 主な入手源 | 1周ごとの概算収量 | 推奨バッファ |
|---|---|---|---|
| スクラップ | 廃墟、壊れたドローン | 1周あたり8〜14 | 60以上 |
| 木材 | 倒木、回収したパレット | 1周あたり10〜18 | 80以上 |
| 金属部品 | 車の残骸、メックの死骸 | 1周あたり4〜9 | 40以上 |
| アロイプレート | 製錬炉の出力(金属部品×2 + 石炭×1) | 製錬サイクル1回あたり2 | 20以上 |
| パワーコイル | 発電機のサルベージ、レア crate | crate1個あたり1〜2 | 10以上 |
Doloc Town Discordのコミュニティテスターは、アロイプレートが重く移動速度を下げるため、スクラップ時にはホットバーにrescue satchelを入れておくことを推奨しています。8枚のアロイプレートを銀行に持つビルダーは、建設中に離脱することなくTier 3拡張全体を配置できます。
スキップ不可の電力コンポーネント
automation 1.0の建築順序では、電力が最優先素材として扱われます。あらゆるプラットフォームプロジェクトで必要となる2つの要素はパワーコイルとCopper Spineで、いずれも南マップの decommissioned relay towers からドロップします。プレイヤー報告によれば、最初の relais tower をクリアすれば通常、6タイルのプラットフォームクラスタを配線するのに十分なコイルが得られますが、Tier 4養液栽培フレームは1タイルあたり3電力を消費するため、コミットする前に2〜3回の relais runs をチェーンしておきたいところです。
ステップバイステップガイド:Doloc Townのプラットフォームの建て方
ここが本記事の実用的な核心部です。以下の手順は、上記の素材をすでに所持し、少なくともTier 2プラットフォームを crafting bench からアンロック済みであることを前提としています。ベンチが story progression の後ろにある場合は、まず「Recycle the Relay」クエストをクリアしてください。Doloc Town how to surviveガイドでその戦闘準備を解説しています。
ステップ1 — 建設ゾーンの清掃と測量
プラットフォームが建つ範囲の周囲を歩いて確認します。プラットフォームは瓦礫タイルにスナップできないため、 debris piles を Knock down します。セントラルアンカーポイントにインベントリからBuilder Beaconを設置します — これはプラットフォームクラスタのフットプリントを緑のプレビューで表示する1.0の QoL アイテムです。Steamコミュニティのプレイヤーはこれを「ゴーストグリッド」トリックと呼び、4枚のアロイプラットフォームを配置してから5枚目のタイルが屋上クリップに阻まれていることに気づくというフラストレーションを防ぎます。
ステップ2 — 基盤プラットフォームの配置
ビルドメニューを開き、プラットフォームに移動して、初めての建設であればTier 2を選択します。アンカータイルを向いた状態で確定キーを押します。Reinforced Platformが所定の位置にスナップし、即座に上面に正方形の土壌区画を生成します。土壌区画を2回目のクリックで確認してください。一部のプレイヤーはプラットフォームを配置したのにプランターを登録し忘れるため、タイルは建っているように見えて何も生産しません。
ステップ3 — 上へ積み重ね、電力を接続
基盤の上および隣接にTier 2プラットフォームを配置します。隣接する3タイルに達すると、ゲームはそのクラスタをpower routingの対象としてフラグします。配線オーバーレイ(デフォルトホットキー:V)を開き、発電機の出力からクラスタのエントリノードへラインをドラッグします。このラインがないと、プラットフォームは視覚的には建っていても機能的には inert です。コミュニティテストでは、対角線を切るのではなくプラットフォームの外側縁に沿ってワイヤーをドラッグすることで、将来のTier 3アップグレードにもクリーンな配線になることが示されています。
ステップ4 — Tier 3タイルにドローンステーションを搭載
アロイプレートと Copper Spines を入手したら、Tier 3アロイプラットフォームに切り替えます。自動化メニューからdrone stationをアロイタイルに直接配置し、ドロップダウンで seeding、nurturing、harvesting のいずれかに割り当てます。1つのドローンステーションは、3×3フットプリントで配置された最大9枚のアロイタイルにサービス提供できます。これが、クラスタが単独の孤立したプラットフォームに勝る理由です。Reddit megathread でのプレイヤー報告によれば、農場全体に1つのステーションを割り当てるよりも、クラスタごとに1つのステーションを専用するほうが信頼性が高くなります。ドローンが空地を渡るのに時間を失うためです。
ステップ5 — Tier 3をTier 4養液栽培フレームへアップグレード
Tier 4はエンドゲームの垂直農場です。クラスタ内の各アロイタイルをHydroponic Frameに置き換え、専用ソーラーパネルまたは風力タービンにクラスタを配線します(消費電力が3倍になるため)。報酬は auto-seed、auto-harvest、そしてフレームに gene machine を直接搭載できることで、これはDoloc Town 遺伝子マシンの使い方ワークフローと美しく統合されます。
建築順序一覧
| ステップ | アクション | トリガー条件 | よくあるミス |
|---|---|---|---|
| 1 | 測量しBuilder Beaconを設置 | なし | ビーコンをスキップしてタイルがクリップする |
| 2 | Tier 2基盤を配置 | スクラップ12、木材4 | 土壌区画の確認を忘れる |
| 3 | プラットフォームを積み重ね配電 | 発電機建設済み、パワーコイル1 | 障害物を対角線で配線してしまう |
| 4 | Tier 3へアップグレードしドローンステーションを追加 | アロイプレート + Copper Spine | ドローンステーションのカバー範囲を広げすぎる |
| 5 | クラスタをTier 4へアップグレード | 専用電源 | 入れ替え後に再配線を忘れる |
Automation 1.0 電力網設計
電力は1.0ビルドメタの通貨であり、レイアウトをコミットする前に電力網を設計することは必須です。公式のプレスリリースによれば、1.0では完全な電力プランニングがゲームに追加されており、もう「とりあえず感覚で」どうにかするわけにはいきません。
ソーラーパネル vs 風力タービン vs 発電機
| 電源 | 出力 | 必要燃料 | 最適な用途 |
|---|---|---|---|
| ソーラーパネル | 4電力、昼間のみ | なし | 日光を浴びる地上プラットフォーム |
| 風力タービン | 6電力、天候依存 | なし | 屋根より高い高所プラットフォーム |
| 発電機 | 10電力、連続稼働 | バイオマスまたは燃料セル | 養液栽培フレームクラスタのバックアップ |
| ハイブリッドリレー | 8電力 | なし | ソーラー+風力の組み合わせで安定供給 |
一般的なコミュニティパターンは、ビル最上層に風力タービンを1基専用することです。高度が実効出力を上げるためで、南向きの側面にはソーラーパネルを使用します。発電機は養液栽培クラスタ用に確保されます。養液栽培は1タイルあたり3電力を消費し、砂嵐イベント中はソーラーアレイを枯渇させるためです。
ドローンステーションのカバー範囲とルーティング
ドローンステーションは全方位約4タイルのサービス半径をブロードキャストします。この半径はステーションのアンカーから計算され、プラットフォームの端からではないため、ステーションをわずかに中央からずらして配置すると1タイル多くカバーできます。9タイルクラスタの場合は、中央にドローンを配置して全方向をカバーさせます。9タイルを超えるクラスタの場合は、反対側の端にもう1基ステーションを追加し、半径を重ね合わせます — 重複カバーは意図的なもので、片方が充電中に片方がワークロードを拾えるようにします。
プレイヤーからは、ドローンのルートは直線ではなくプラットフォームの縁に沿うため、L字型クラスタは正方形のものより横断に時間がかかるとの指摘があります。地形が許す限り、クラスタは正方形または長方形に保ちましょう。
複数プラットフォームにわたる農場の拡張
1つのクラスタが順調に稼働し始めると、次に広がりたい衝動にかられます。1.0アップデートでは farm expansion territories が追加され、開始地点のDoloc Townフットプリント外でも新たな建設ゾーンを claim できます。各 territory には独自の土壌品質評価があり、Premium soil 上に建てたプラットフォームは収穫サイクルあたり約20%多く実ります。
拡張ステージとその要件
| ステージ | 解放される新タイル | コスト | 電力需要 |
|---|---|---|---|
| Stage 1 — 隣接区画 | +9タイル | スクラップ50 + 木材20 + 金属部品10 | なし |
| Stage 2 — リバーサイドテラス | +16タイル | スクラップ80 + 木材30 + 金属部品20 + アロイプレート5 | +4電力 |
| Stage 3 — ハイランド温室 | +25タイル | スクラップ120 + 木材50 + 金属部品40 + アロイプレート15 | +10電力 |
| Stage 4 — スカイブリッジネットワーク | +36タイル | スクラップ200 + 木材80 + 金属部品60 + アロイプレート30 | +18電力 |
Steamストアページで触れられているcellar upgradeは、垂直拡張を置き換えるのではなく補完するものです。より深いセラーはより多くの種子品種を保管し、 rare gene samples をアンロックするため、高所プラットフォームにより豊かな遺伝子プールがもたらされます。プレイヤー報告によれば、Stage 4 Skybridge と最大化したセラーの組み合わせは、ゲーム内で1日あたりの収量が最も高くなります。
安定した電力のための拡張シーケンス
すべての territory を一度に獲得したくなる衝動は抑えてください。新しい拡張はそれぞれ、電力がドローンがドッキングする前にグリッドが吸収すべき需要を追加します。コミュニティテスターはPower-First Rule(電力第一の法則)を推奨しています — 現在のグリッドに少なくとも25%の余剰出力がある時のみ、新しい territory をアンロックしてください。この余剰が夜間サイクルのクッションとなり、ソーラーパネルがゼロになってもドローンは育成パスを完了できます。
よくある落とし穴とプロの tips
最善のガイドをもってしても、初心者は予測可能なミスを犯します。以下のリストは最も報告されている問題とその回避法です。
-
territory を claim する前にプラットフォームを配置する — 未 claim タイルはプラットフォーム配置を拒否します。測量し、claim し、それから建設。
-
土壌確認のクリックを忘れる — プラットフォームは設置されるが、区画が登録されない。日サイクル後に作物カウンターがゼロのままなら、ほとんどの場合これが原因。
-
壁を通して配電する — ワイヤーは視覚的には石壁を貫通しますが、接続されません。開いた縁に沿って配線するか、先に壁を壊してください。
-
1つのメガクラスタにドローンを重ねる — 1つのドローンステーションがサービスできるのは9タイルのみ。大型農場は複数の3×3クラスタに分割。
-
cellar upgrade を無視する — レアな種子が眠るのはセラーであり、レアな種子がTier 4養液栽培フレームをアロイ投資に見合うものにする。
-
Builder Beacon プレビューをスキップする — 4枚のアロイプラットフォームを配置してから5枚目が屋上にクリップされていると気づくのは、コストのかかる再構築を強いられる
-
障害物を対角線で配線する — 対角線の導管は経路が長くなり、伝送損失が大きい。縁に沿ってルートしてください
-
専用電力なしにTier 4へアップグレードする — 養液栽培フレームは1タイルあたり3電力を消費し、計画不足のグリッドを枯渇させる
-
ドローンステーションのカバー範囲を広げすぎる — 9タイルクラスタあたり1ステーションで移動時間を4タイル以下に保つ
-
プラットフォーム入れ替え後に再配線を忘れる — Tier 3をTier 4に置き換えると既存の導管接続が切れる
強調しておくべきプロのコツ : アロイ素材を使う前に、Tier 1スクラッププラットフォームで足場スケルトンを事前に組んでおきます。スケルトンによりレイアウトを可視化し、構造物を安全に上り下りでき、ストックの成長に合わせて各タイルを上方向へ入れ替えられます。このアプローチではまた、高価なタイルが欠陥ある設計にロックされる前に、安価なタイルで配電ルーティングをテストできます。
よくある質問
Doloc Townのプラットフォームの建て方を最速で学ぶには?
crafting bench の近くに単一のTier 2 reinforced platform を建て、基本発電機に配線し、正方形のフットプリントで外側に広げます。1日目から多層メガファームを建てようとするプレイヤーは、配線を終える前にアロイプレートが尽きるのが通常なので、小さなクラスタで反復するのがマスタリーへの最速経路です。
Doloc Town automation 1.0 はプラットフォームを必須としますか、それとも地上レベルの農場も自動化できますか?
地上レベルのプランターは、近接するドローンステーションがある場合に自動給水などの一部の自動化メリットを受けられますが、ドローンステーション自体をホストすることはできません。完全な auto-seed、auto-harvest、 gene machine ループはTier 3アロイプラットフォームおよびTier 4養液栽培フレームでのみ機能します。これが、Doloc Town automation 1.0プレイヤーが最終的にすべての productive crop を上層へ移行させる理由です。
Tier 4養液栽培クラスタには何枚のソーラーパネルが必要ですか?
標準的な3×3 Tier 4クラスタは、完全稼働時に27電力を消費します(各タイルが3電力を使用するため)。1台の発電機でその需要をカバーできますが、発電機は燃料を燃やすため、ほとんどのビルダーは風力タービン1基とソーラーパネル2基を組み合わせて、平均的な天候で約14電力を生み出す燃料不要の供給とします。砂嵐でソーラー出力が落ちた際のバックアップ発電機を追加してください。
配置後にプラットフォームを移設できますか?
はい、ただし完全な素材返還で deconstruct できるのはTier 1およびTier 2プラットフォームのみです。Tier 3アロイプラットフォームはコストの約60%が戻り、Tier 4養液栽培フレームは撤去時に粉砕され、何も得られません。最後のアロイプレートをコミットする前にレイアウトを慎重に計画してください — これが前述の Builder Beacon トリックが何度も報われる理由です。
レイトゲームプラットフォーム用の一番レアな素材はどこで入手できますか?
Stage 3拡張でアンロックされるHighland Greenhouse territory には、ゲーム内で最も高密度なアロイノードクラスタがあります。南の尾根の abandoned relay towers への夜間サイクル遠征と組み合わせれば、ゲーム内2週間以内にフルStage 4 Skybridgeネットワークを建設できるはずです。
新しいSkybridgeレイアウトを試しましたか、それとも最初のアロイクラスタで今も反復中ですか?お気に入りの垂直農場デザインを下のコメントにドロップしてください — コミュニティは開発者がパッチを当てるより速くブループリントを交換するので、あなたのアイデアが公式Discordの次のビルダーショーケースに載るかもしれません。